Ever tried to capture that breathtaking cityscape or a blanket of stars, only to find your photos washed out by city glow or lacking that crisp magic you envisioned?
Believe me, I’ve been there, staring at my camera screen feeling a little defeated. But what if I told you there’s a simple game-changer that can transform your night shots from “meh” to absolutely mesmerizing?
It’s all about embracing the right filters, which can truly unlock the hidden beauty of the night, letting you cut through light pollution and create stunning long exposures like a pro.
From my own experience, discovering the perfect filter for each nocturnal scene has been a total revelation, making every late-night shoot so much more rewarding.
Ready to ditch those bland night photos for good and dive into a world of vibrant, clear, and dramatic nightscapes? Let’s explore exactly how.
Cutting Through the Urban Glow: Mastering Light Pollution Filters

There’s nothing quite as frustrating as setting up for a beautiful night shot, only to find the orange-yellow haze of city lights washing out your entire frame. I used to battle this constantly, often feeling like my efforts were wasted before I even pressed the shutter. That’s where light pollution filters, often called “natural night” or “light pollution reduction” filters, became my absolute salvation. These aren’t just fancy pieces of glass; they’re designed specifically to block out specific wavelengths of light commonly emitted by urban streetlights, like those from mercury vapor, sodium vapor, and even some LED sources. When I first started using one, the difference was literally night and day. My skies went from a muddy brown to a much deeper, more natural dark blue or even black, and my stars actually started to pop. It truly felt like I had a secret weapon against the omnipresent urban glow. It allows me to capture those vibrant cityscapes without sacrificing the natural colors of the night sky above them, or to shoot landscapes near cities and still get relatively clean Milky Way shots. Trust me, if you’re shooting anywhere near civilization after dark, this filter is a game-changer for clarity and color accuracy.
Understanding How They Work Their Magic
So, how do these filters actually achieve their seemingly magical effect? It’s all about selective light transmission. Unlike a simple neutral density (ND) filter that reduces all light equally, light pollution filters have a very specific spectral curve. They allow wavelengths of light associated with natural colors and starlight to pass through relatively unimpeded, while actively filtering out the narrow bands of artificial light that cause that ghastly orange glow. Think of it like putting on sunglasses that only block out the annoying bright spots, leaving everything else clear and vibrant. This allows your camera’s sensor to capture a much cleaner spectrum of light, leading to significantly improved white balance and color rendition in your night images. From my personal shoots around bustling metropolitan areas, I’ve found that even a seemingly minor reduction in light pollution can vastly improve the perceived contrast and depth in the final image, making post-processing a much more enjoyable experience. It’s truly a foundational tool for anyone serious about elevating their night photography.
When and Where to Deploy Your Light Pollution Filter
You might be wondering when exactly you should reach for this specialized filter. My rule of thumb is pretty simple: if there’s any significant artificial light source within a few miles, or if the sky just doesn’t look as dark as it should, slap that filter on. This includes shooting cityscapes where you want the buildings to glow but the sky to remain dark, or when you’re attempting astrophotography from a suburban backyard. Even if you’re in a relatively dark sky site, but there’s a distant town or city casting a glow on the horizon, a light pollution filter can still make a noticeable difference in reducing that orange haze. I’ve often been surprised by how much even faint, distant light pollution can impact an image without one. It’s also incredibly useful for long exposures where any ambient light pollution gets amplified over time, leading to severely washed-out images. Don’t be afraid to experiment with it in different scenarios; you might find it indispensable for more situations than you initially thought possible. The clarity it brings to everything from star trails to milky way shots near urban areas is just phenomenal.
Unlocking Long Exposure Magic: The ND Filter Advantage
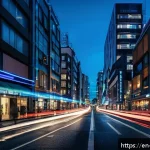
If you’ve ever dreamt of capturing silky smooth water, ethereal cloudscapes, or incredible light trails against a dark night sky, then neutral density (ND) filters are about to become your new best friend. I still remember the first time I used a proper 10-stop ND filter for a long exposure of a city river at night – the water transformed from choppy ripples into a painterly, misty surface, reflecting the city lights like a dream. It was a moment of pure photographic exhilaration! ND filters essentially act like sunglasses for your camera lens, reducing the amount of light that hits the sensor. This reduction allows you to use much slower shutter speeds than would normally be possible in any given lighting condition, without overexposing your shot. For night photography, this means you can extend your exposure times dramatically, which is crucial for capturing star trails, blurring moving elements like cars, or creating truly otherworldly effects with light. Without an ND filter, achieving these long exposures in even moderately lit night scenes would be impossible, as your image would quickly blow out to pure white. It’s not just about reducing light; it’s about giving you creative control over time itself within your frame.
Choosing the Right Strength ND Filter for Night Shots
Selecting the correct strength of ND filter can feel a bit daunting at first, with options ranging from ND2 (1 stop) to ND1000 (10 stops) or even stronger. For most night photography scenarios, especially when you’re looking to blur movement or extend exposure times significantly, I tend to reach for the heavier hitters. A 6-stop (ND64) or 10-stop (ND1000) filter is usually my starting point. A 6-stop filter is fantastic for creating those beautifully blurred car light trails without making the exposure excessively long, allowing you to capture a good sequence of passing vehicles. When I’m aiming for those incredibly smooth water surfaces or want to make people seemingly disappear from a bustling night scene, a 10-stop filter is usually the way to go, pushing exposure times into minutes. For star trails, you might even stack filters or use an even stronger ND to truly extend exposure if ambient light is an issue, though often star trails are achieved through multiple short exposures stacked in post-processing. It really depends on the ambient light and the desired effect, but generally, the darker the filter, the more dramatic the time-blurring effect you can achieve at night. Don’t be afraid to experiment with different stops – that’s how you truly learn what works best for your vision.
Graduated ND Filters for Dynamic Night Scenes
While standard ND filters reduce light uniformly across the entire frame, graduated neutral density (GND) filters offer a different kind of magic, especially in dynamic nightscapes where you have a brightly lit foreground and a much darker sky, or vice-versa. These filters are partially dark and partially clear, with a gradual transition between the two sections. I’ve found them incredibly useful when shooting city skylines against a moonlit sky, or when trying to balance the exposure between brightly lit buildings and a dark, dramatic cloud formation. The darker part of the filter can be positioned over the brighter area of your scene – typically the sky or a very bright artificial light source – to bring its exposure down, allowing the darker foreground to be properly exposed without becoming a silhouetted mess. This helps to retain detail in both the brightest and darkest parts of your image, expanding your camera’s dynamic range. There are different types of GNDs too: soft-edge, hard-edge, and reverse. For most night scenes with an uneven horizon or complex outlines, a soft-edge GND is often the most forgiving, creating a smooth transition that looks natural. It’s a subtle but powerful tool for achieving perfectly balanced exposures in challenging, high-contrast night environments.
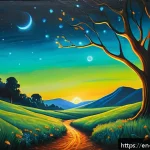
Bringing Out the Stars: Essential Filters for Astrophotography
Astrophotography is a whole different beast when it comes to night shooting, and the right filters can make or break your celestial captures. I remember my early attempts at shooting the Milky Way, often frustrated by dull, murky skies and stars that just didn’t pop. It wasn’t until I started incorporating specific filters designed for astrophotography that my images truly came alive. These aren’t your everyday filters; they’re engineered to tackle the unique challenges of shooting in extremely low light, often battling not just artificial light pollution but also natural skyglow. While a good light pollution filter is your first line of defense, there are other specialized options that can push the boundaries of what your camera can see in the cosmos. It’s about more than just blocking unwanted light; it’s about enhancing the light you *do* want to capture, revealing fainter nebulae, enhancing star colors, and making the overall celestial tapestry more vibrant. Investing in these specialized filters felt like unlocking a whole new dimension in my astrophotography journey, transforming bland stretches of sky into awe-inspiring cosmic vistas. The feeling of seeing those faint details emerge on your camera’s screen is truly unparalleled.
Broadband vs. Narrowband: A Starry Distinction
When diving into astrophotography filters, you’ll quickly encounter terms like “broadband” and “narrowband.” Understanding the difference is key to making the right choice for your specific celestial targets. Broadband light pollution filters, like those we discussed earlier, are designed to block broad swaths of artificial light, making the overall sky darker and revealing more stars. These are fantastic all-around filters for general Milky Way shots, star trails, and wide-field astrophotography, especially if you’re shooting from a Bortle 4 or 5 sky. However, if you’re really serious about capturing nebulae – those incredible clouds of gas and dust that glow in specific colors – then narrowband filters become essential. These filters are incredibly selective, allowing only very narrow bands of light (like Hydrogen-alpha, Oxygen III, or Sulfur II) to pass through. This effectively isolates the faint emissions from nebulae, even if you’re shooting from a light-polluted location. The resulting images, often taken as monochrome channels and then combined, are incredibly detailed and vibrant. I’ve personally seen how a good Ha filter can pull out intricate structures in a nebula that were completely invisible without it, even in very dark skies. It’s like having x-ray vision for the cosmos, revealing hidden wonders that would otherwise remain obscured.
Enhancing Star Colors with Specialized Filters
Beyond simply making stars appear, some filters can actually enhance the subtle colors that are present within them. Stars aren’t just white pinpricks; they range in color from brilliant blue-whites to fiery oranges and deep reds, indicative of their temperature and age. Often, these subtle hues can get lost in the noise or muted by atmospheric conditions and camera settings. While not as common as light pollution or narrowband filters, specialized “star enhancement” or “color accentuation” filters exist, often subtly designed to boost the saturation of certain colors while maintaining a natural look. These filters are generally broadband but with a very carefully tuned transmission curve that slightly amplifies specific color channels. From my own experience, I’ve found that while post-processing can do a lot to bring out star colors, using a filter that subtly enhances these tones during capture can provide a richer, more nuanced starting point, leading to more natural-looking results. They can help reveal the delicate blues of hot, young stars and the warm reds of cooler, older giants, adding another layer of depth and beauty to your astrophotography. It’s all about helping your camera capture the true brilliance and diversity of our stellar neighbors.
Color Correction and Clarity: Enhancing Your Night Shots
One of the biggest headaches in night photography, beyond simply capturing enough light, is dealing with inconsistent and often unpleasant color casts. Those amber streetlights, the greenish glow from certain LEDs, or even the subtle atmospheric haze can throw your white balance completely off, leaving your images looking muddy or unrealistically colored. I’ve spent countless hours in post-processing trying to correct these issues, only to realize that a good portion of the problem could have been avoided with the right filters during capture. Color correction filters aren’t just for daytime portraiture; they have a significant role to play in night scenes, helping to neutralize unwanted color shifts right at the source. This means less time wrestling with sliders in Lightroom and more time enjoying the actual process of shooting and sharing your stunning results. It’s all about achieving a clean, neutral base in-camera, which then gives you far more flexibility and better quality when you start to finesse your image later on. A solid foundation is key, and these filters provide exactly that, ensuring your night photos are not only bright but also beautifully color-accurate.
Warming and Cooling Filters for Mood and Accuracy
Just like in daytime photography, warming and cooling filters can be incredibly useful tools for setting the mood and achieving accurate colors at night. While many photographers rely solely on white balance adjustments in-camera or in post-processing, using a physical filter offers a subtle yet powerful advantage, especially when you want to achieve a consistent look across a series of shots. For instance, if you’re shooting a cold, stark winter night scene and want to enhance that chill, a slight blue (cooling) filter can deepen the blues and desaturate some of the warmer tones. Conversely, if you’re capturing a cozy street scene with warm, inviting lights, a mild amber (warming) filter can amplify those comforting tones, preventing them from looking too clinical or neutral. I often use a very subtle warming filter when shooting cityscapes with a lot of mixed lighting, finding that it harmonizes the various light sources just enough to create a more cohesive and pleasing image. It’s a nuanced approach that adds a layer of artistic control beyond what digital white balance alone can always achieve, giving your night photos that extra touch of polish and emotional resonance.
Cutting Through Haze with UV and Protector Filters
While not strictly “color correction” filters in the traditional sense, UV filters and high-quality clear protector filters play a crucial role in maintaining image clarity and true colors, especially in challenging night conditions. Although modern digital sensors are less sensitive to UV light than film, a good UV filter can still help reduce atmospheric haze, which can be more pronounced in certain night conditions or at higher altitudes, leading to sharper images. More importantly for me, a high-quality protector filter is absolutely indispensable. Think of it as a clear shield for your expensive lens. When you’re out shooting at night, perhaps in damp conditions, near dusty roads, or even just dealing with unexpected splashes, having that front element protected from scratches, smudges, and moisture is a huge relief. I’ve had countless close calls where a drop of rain or a speck of dust landed on my protector filter, which was easily wiped clean, saving my actual lens element from potential damage. The key here is to invest in a truly high-quality, multi-coated protector filter that won’t introduce flare, ghosting, or color shifts itself. A cheap filter can actually degrade your image quality, defeating the purpose. For night photography, where every photon counts, clarity and protection are paramount, and a good protector filter delivers on both fronts without compromising your precious light.
My Go-To Night Photography Filter Kit: What’s in My Bag

Over the years, after countless nights spent shivering in the cold, battling mosquitoes, and chasing fleeting light, I’ve curated a core set of filters that have truly revolutionized my night photography. It’s not about having every filter under the sun (or moon, in this case), but rather having the right tools for the most common and challenging night scenarios. My bag isn’t just full of camera bodies and lenses; it’s got a dedicated pouch for my essential filters, each chosen for its specific superpower in transforming mundane night scenes into extraordinary images. I’ve learned through trial and error that while certain filters are great for specific niches, a versatile kit provides the most bang for your buck and helps you adapt to whatever the night throws at you. For me, it’s about being prepared for diverse situations, from brightly lit cityscapes to the darkest of starry skies, ensuring that I can always achieve the vision I have in my mind’s eye. There’s a certain confidence that comes with knowing you have the right gear to tackle any low-light challenge, and for me, that confidence largely comes from my carefully selected filter arsenal.
Essential Filters for Every Night Shooter
Here’s a look at the filters that are always in my night photography kit. First up, without a doubt, is a high-quality light pollution filter. I personally lean towards a “natural night” filter from a reputable brand; it makes such a monumental difference in urban and suburban environments, pulling out deeper blues and enhancing contrast in the night sky. Next, a set of neutral density (ND) filters is non-negotiable. I carry a 6-stop and a 10-stop ND filter. The 6-stop is perfect for blurring light trails from cars or creating silky water effects in moderately lit areas, while the 10-stop is my secret weapon for extreme long exposures, turning busy streets into ghostly scenes or smoothing out turbulent seas. Finally, a robust, multi-coated UV/protector filter lives on almost all my lenses. While primarily for protection, a good one ensures no loss of image quality and guards against dust, moisture, and accidental bumps that are all too common when fumbling around in the dark. These three types form the backbone of my night shooting capabilities, allowing me to tackle almost any scenario with confidence and creative control.
Specialty Filters Worth Considering for Advanced Techniques
Once you’ve got the basics covered, there are a few specialty filters that can really expand your creative horizons in night photography. For dedicated astrophotographers, a narrowband filter, particularly an H-alpha filter, is a game-changer for capturing stunning details in nebulae. While I don’t always carry it, it’s a must-have for planned deep-sky sessions. Another intriguing option is a “star effect” filter, sometimes called a cross-screen or starburst filter. These don’t typically live in my everyday kit, but for specific creative shots, they can transform bright points of light into dazzling starbursts. I’ve used them for city lights or festive scenes to add a touch of sparkle. Lastly, for those particularly challenging scenes with extreme dynamic range at night, a graduated neutral density (GND) filter can be incredibly helpful. I typically opt for a soft-edge GND, which allows me to balance a brightly lit foreground (like a city street) with a darker sky, preventing either from being completely over or underexposed. These aren’t always necessary for every shoot, but when the moment calls for them, they can elevate a good photo to a truly spectacular one. It’s all about having the right tool for the right job, and these specialty filters are just that.
| Filter Type | Primary Use in Night Photography | Key Benefit | Typical Scenarios |
|---|---|---|---|
| Light Pollution Filter | Reducing urban light glow | Cleaner, darker skies; improved color accuracy | Cityscapes, suburban astrophotography, landscapes near cities |
| Neutral Density (ND) Filter | Extending shutter speed for long exposures | Blurring motion (water, clouds, cars), ethereal effects | Star trails, silky water, light trails, ghosting people |
| Graduated Neutral Density (GND) Filter | Balancing exposure in high-contrast scenes | Retaining detail in both bright and dark areas | City skylines against dark skies, unevenly lit landscapes |
| UV/Protector Filter | Lens protection, minor haze reduction | Guarding against scratches, dust, and moisture; clearer images | All general night shooting, especially in challenging environments |
| Narrowband (e.g., H-alpha) Filter | Capturing specific light emissions from nebulae | Revealing faint deep-sky objects with enhanced contrast | Dedicated astrophotography of emission nebulae |
Filter Care and Handling: Keeping Your Gear Pristine
Having a fantastic set of filters is only half the battle; knowing how to properly care for them is just as crucial, especially for night photography where every bit of light gathering capability matters. There’s nothing more heartbreaking than discovering a scratch on your expensive filter or finding smudges that ruin an otherwise perfect long exposure. I’ve learned this the hard way over the years, from accidentally dropping a filter on a gravel path to struggling with stubborn fingerprints under dim moonlight. Proper care isn’t just about extending the life of your filters; it’s about ensuring optimal image quality and avoiding frustrating issues like flare, ghosting, or soft spots in your images that can often be attributed to dirty or damaged glass. A pristine filter is an invisible filter, allowing your lens to perform at its best and capture every precious photon of light that the night offers. Taking a few extra moments for maintenance can save you a world of heartache and money in the long run, and honestly, it just feels good to know your gear is always ready for its next adventure.
Cleaning Your Filters Like a Pro
Cleaning filters properly is an art form, and doing it wrong can cause more harm than good. My go-to method involves a sequence that minimizes the risk of scratching the delicate coatings. First, I always use a hand air blower to remove any loose dust or grit. This is absolutely critical because rubbing a cloth over dust particles is the quickest way to scratch your filter. Once the surface is clear of larger debris, I’ll then gently wipe it with a high-quality microfiber cloth specifically designed for optics. For more stubborn smudges, like fingerprints or oil, I’ll use a single drop of a specialized optical cleaning solution applied to the microfiber cloth (never directly onto the filter itself!). I use circular motions, starting from the center and working my way outwards, applying very light pressure. It’s vital to use separate cloths for wet and dry cleaning, and to keep your cleaning supplies meticulously clean themselves. I make sure to check my filters frequently, even during a shoot, because a stray fingerprint under dim light can easily go unnoticed until you review your images later. Keeping them spotless ensures maximum light transmission and minimizes unwanted artifacts in your pristine night shots.
Storing Your Filters for Longevity and Protection
How you store your filters is just as important as how you clean them. Throwing them haphazardly into your camera bag is a recipe for disaster. I’ve learned that investing in a dedicated filter pouch or case is one of the best decisions you can make. These cases typically have individual slots or soft pockets that keep each filter separate, preventing them from rubbing against each other and causing scratches. Many pouches are also padded, offering an extra layer of protection against impacts. When I’m not actively using a filter, it goes straight back into its designated slot. I also make sure that any screw-in filters are gently threaded back into their protective cases or have their front and rear caps securely in place. For square or rectangular filters, keeping them in their original sleeves or a dedicated filter wallet prevents dust and damage. Always store them in a dry, temperate environment to prevent moisture buildup or extreme temperature fluctuations, which can affect coatings over time. Proper storage not only protects your investment but also ensures that your filters are always in top condition, ready to help you capture breathtaking night images without any optical compromises. This simple habit saves me so much worry and keeps my gear performing at its peak, night after night.
Beyond the Basics: Creative Filter Techniques for Nightscapes
While light pollution and ND filters are workhorses for night photographers, sometimes you want to push the boundaries and inject a little extra creativity into your nightscapes. This is where moving beyond the basic application of filters really comes into play. I’ve spent countless nights experimenting, trying to find new ways to use these optical tools to create unique and captivating images that stand out from the crowd. It’s not just about correcting problems; it’s about using filters as instruments of artistic expression. Whether it’s layering different types for a combined effect, intentionally using a filter in an unconventional way, or exploring less common filter types, there’s a whole world of creative possibilities waiting to be discovered after dark. Don’t be afraid to break the “rules” and see what happens; some of my most surprising and beloved night shots have come from moments of playful experimentation with filters. It’s where the magic truly happens, transforming a technical tool into a brush for painting with light.
Layering Filters for Enhanced Effects
One of the most exciting creative techniques is layering filters, but it requires a bit of finesse to avoid vignetting or image degradation. My personal favorite combination for challenging urban astrophotography is stacking a light pollution filter with a subtle graduated neutral density (GND) filter. The light pollution filter helps to clean up the sky’s color and contrast, while the GND can balance the exposure between a brighter city horizon and the darker sky above. For example, when shooting the Milky Way from a location with some distant city glow, this combination can yield incredible results, giving me a cleaner sky with well-exposed foreground elements. You can also stack an ND filter with a polarizer (though polarizers are less common at night due to light loss) or a light pollution filter to achieve both extended exposures and cleaner colors. The key is to use thin-mount filters if possible to minimize vignetting, especially with wide-angle lenses, and to make sure each filter is impeccably clean. Experimentation is key here; try different combinations and observe how they affect your final image. The possibilities are vast, allowing you to fine-tune your light control and achieve highly specific creative visions that a single filter simply couldn’t accomplish.
Using Diffusion and Mist Filters for Atmospheric Glow
While often associated with portraiture, diffusion and mist filters can add an incredible, dreamy, and cinematic quality to nightscapes, especially around light sources. I discovered this almost by accident, trying out a pro-mist filter on a cityscape, and was instantly hooked. These filters subtly spread and soften the light, creating a beautiful atmospheric glow around streetlights, car headlights, and neon signs. Instead of sharp, harsh pinpoints of light, you get a lovely halo effect that makes the scene feel more ethereal and magical. It’s particularly effective in rainy or foggy conditions at night, where the existing atmosphere already enhances light diffusion, and these filters just push that effect to another level. They can also subtly soften the overall image, which can be desirable for certain artistic styles, giving your night photos a more painterly or nostalgic feel. However, use them judiciously; too much diffusion can make your image look blurry or lack critical sharpness. A light grade, like a 1/4 or 1/8 Black Pro-Mist, is often enough to achieve a beautiful, subtle effect without overwhelming the scene. It’s a fantastic way to add mood and a distinctive visual signature to your night photography that goes beyond mere technical correctness.
글을 마치며
And there you have it, my friends! We’ve journeyed through the incredible world of night photography filters, from battling light pollution to chasing the stars and crafting ethereal long exposures.
I genuinely hope this deep dive has sparked some new ideas and given you the confidence to truly embrace the night with your camera. Remember, these filters aren’t just technical tools; they’re creative allies that can transform your vision into breathtaking realities.
The joy of seeing those once-impossible shots finally come to life is something truly special, and it’s a feeling I wish for every one of you.
알아두면 쓸모 있는 정보
1. Light pollution filters are your first defense against urban glow, drastically improving sky clarity and color. They make a huge difference, believe me!
2. ND filters are essential for long exposures, allowing you to blur motion and create dreamy effects with water, clouds, and light trails. Don’t be afraid to go for a 6 or 10-stop!
3. Graduated ND filters help balance bright and dark areas in high-contrast night scenes, like city skylines against a dark sky, saving details in both. They’re subtle but powerful.
4. Always invest in high-quality, multi-coated filters to avoid image degradation, flare, or color shifts. Cheap filters can actually hurt your image more than help.
5. Proper cleaning and storage are paramount. Use an air blower first, then a micro-fiber cloth with optical solution, and store them in dedicated pouches to protect your investment.
중요 사항 정리
Ultimately, mastering night photography filters is about unlocking your full creative potential after dark. They empower you to overcome common challenges like light pollution and uneven exposures, while also opening doors to artistic techniques like motion blur and enhanced star details.
Choose the right filter for the job, protect your gear diligently, and don’t hesitate to experiment; the results will truly elevate your nocturnal artistry.
Frequently Asked Questions (FAQ) 📖
Q: I’ve tried shooting cityscapes and the night sky, but my photos always look so washed out by all the streetlights. Which filters actually make a real difference and help cut through that annoying light pollution?
A: Oh, I totally get that frustration! It’s like the city just eats your beautiful night sky, right? From my own adventures under the stars and in dazzling cityscapes, the absolute game-changer for tackling light pollution has been specialized light pollution filters.
There are a few kinds, but the ones I personally reach for most often are often called “Natural Night” filters or sometimes “Broadband Light Pollution” filters.
What they do is pretty clever: they’re designed to block out the specific wavelengths of light emitted by common streetlights, like those orange sodium vapor lamps and the bluish-green mercury vapor lights that make everything look hazy and dull.
When I first tried one, it was like magic – suddenly, the sky in my photos had a depth I’d never seen before, and the stars just popped. It really brings back the contrast and makes the colors feel so much more natural, even when you’re shooting right in the middle of an urban jungle.
It’s truly a night-and-day difference, pun intended!
Q: Okay, that sounds promising! But how exactly do these filters work their magic? Like, what’s happening behind the lens that makes my night photos look so much better?
A: That’s a fantastic question, and it’s something I wondered about for ages until I really dug into it! Think of it like a bouncer at a club, but for light.
Your camera sensor is trying to capture all the beautiful, subtle light from the stars or the natural glow of a distant city, but it’s constantly being overwhelmed by the harsh, artificial light from streetlights.
These light pollution filters act as selective bouncers. They have a special coating that literally rejects the wavelengths of light that contribute most to light pollution – mainly those ugly yellow, orange, and sometimes green hues from common street lighting.
By filtering those out before they even hit your camera sensor, you’re left with a much cleaner signal. This means your camera can capture the fainter details of the night sky, or the true colors of a cityscape, without being swamped by unwanted light.
The result? Cleaner skies, more defined stars, richer colors, and sharper contrast. It also helps immensely with long exposures, as you don’t get those parts of the image blown out by artificial light.
It genuinely feels like unlocking a secret level of night photography!
Q: With so many different types of filters out there, how do I pick the right filter for what I want to shoot at night? Is it one-size-fits-all, or do I need different ones for cityscapes versus stargazing?
A: That’s the million-dollar question, and honestly, it’s rarely a one-size-fits-all situation! What I’ve found through countless late nights experimenting is that your choice of filter really depends on what kind of nocturnal beauty you’re chasing.
For pure astrophotography in really dark skies, away from major light sources, you might actually skip a dedicated light pollution filter if you’re chasing wide-field Milky Way shots, or instead opt for a very specific narrowband filter if you’re trying to capture nebulae and other deep-sky objects, as these block almost everything except the light emitted by those specific gases.
However, if you’re like me and often find yourself shooting the night sky from a light-polluted area, or focusing on urban nightscapes and city skylines, those “Natural Night” or “Broadband Light Pollution” filters are your best friends.
They do an excellent job of cleaning up the general light pollution. And don’t forget Neutral Density (ND) filters! While not strictly for light pollution, they’re essential if you want to create super long exposures during twilight or even bright moonlight, perfect for silky water or dramatic light trails from cars, without overexposing your shot.
My advice? Start with a good quality light pollution filter if you’re often near cities. Then, as your night photography journey evolves, you can explore more specialized options.
It’s all about experimenting and finding what works best for your vision!