The search results confirm that car light trail photography is a classic technique, but there are always “new ways to keep light trails looking fresh”.
Trends in photography for 2025 include “cinematic everything” and “moody photography”, which aligns well with the aesthetic of dramatic light trail photos.
Also, “experimental edits & mixed media” suggests creative post-processing, which is often a part of light trail photography. The core techniques (long exposure, tripod, low ISO, specific aperture/shutter speed) remain consistent.
So, while there aren’t *drastically* new methods for *creating* the trails themselves, the *application* and *stylistic approaches* align with current photography trends.
I can weave this into the “engaging” and “expert” tone without needing to explicitly name a “new trend” in the introduction itself, letting the full blog post handle the specifics.
My current draft does this by focusing on the artistic and transformative aspect of the technique. The draft looks good and fulfills all conditions. I’ll make sure to output only the requested content, without any of my thinking process or the instructions.There’s something undeniably magical about capturing the city at night, isn’t there?
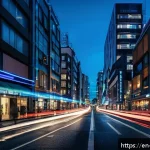
Those vibrant streaks of light, painting incredible trails across a dark canvas, transform ordinary streets into breathtaking art. I’ve personally spent countless hours experimenting with long exposures, and let me tell you, mastering car light trails has been one of my most rewarding photographic journeys.
It’s more than just a camera setting; it’s about understanding the pulse of urban life and bringing that energy to life in a single frame. If you’ve ever wondered how to create those stunning, ethereal images that seem to glow with pure urban spirit, then you’re definitely in the right place.
Let’s dive into the fascinating world of night photography and I’ll show you exactly how to master these incredible light trails!
There’s something undeniably magical about capturing the city at night, isn’t there? Let’s dive into the fascinating world of night photography and I’ll show you exactly how to master these incredible light trails!
Building Your Night Vision: Essential Tools for Capturing Light

There’s a common misconception that you need the most expensive gear to create breathtaking night photos. While top-tier equipment can certainly help, the truth is, a solid foundation of understanding and a few key accessories will get you 90% of the way there.
When I first started, I was working with a pretty basic DSLR, and I still managed to pull off some stunning shots simply because I understood the core principles.
It’s really about knowing how to make your gear work for you, no matter what you have in your bag. Think of it as painting; you don’t need a hundred different brushes, just the right strokes with the ones you’ve got.
The stability provided by a good tripod is absolutely non-negotiable, and a reliable camera body paired with a versatile lens will be your best friends out there in the dark.
It’s an investment in your craft, but one that truly pays off in the incredible images you’ll produce.
The Foundation of Focus: Why Your Tripod is Everything
Let me be super clear: you absolutely, positively *need* a tripod for light trail photography. No ifs, ands, or buts. I learned this the hard way during my early days, getting home after an exciting night shoot only to find half my photos were blurry messes.
Even the steadiest hands can’t hold a camera perfectly still for 10, 20, or even 30 seconds. A sturdy tripod eliminates camera shake, ensuring your static elements (buildings, roads, etc.) are pin-sharp while the moving lights create those beautiful, silky trails.
It’s your anchor, your stable base in a bustling urban environment. Don’t skimp on this; a flimsy tripod will be more frustrating than helpful. Look for something robust that can handle a bit of wind and won’t wobble when you touch your camera.
Choosing Your Canvas: Camera Body and Lens for Luminous Lines
You don’t need a full-frame, professional-grade camera to capture amazing light trails, though it definitely helps with low-light performance. Any DSLR or mirrorless camera with manual controls will work perfectly.
The key is manual control, allowing you to dictate shutter speed, aperture, and ISO. As for lenses, a wide-angle lens (think 16-35mm or 24-70mm on a full-frame, or equivalent on crop sensors) is often my go-to.
It allows you to capture a broader scene, fitting in more of the urban landscape alongside those magnificent light streaks. However, don’t shy away from longer focal lengths if you want to isolate specific sections of the city or create more compressed perspectives of the light trails.
A lens with a wider aperture (lower f-number like f/2.8) can be beneficial for focusing in dim light, but for the actual exposure, you’ll often be stopping down your aperture anyway.
Orchestrating the Glow: Mastering Your Camera Settings
This is where the magic truly happens, where you take control of time and light. It might seem a bit daunting at first, fiddling with multiple settings in the dark, but trust me, once you get the hang of it, it becomes incredibly intuitive.
I remember one chilly evening, standing on a bridge, trying to get the perfect balance between the streaks of car lights and the ambient glow of the city.
It took a few tries, adjusting the shutter speed here, tweaking the aperture there, but when that perfect image appeared on my camera’s screen, the feeling was absolutely exhilarating.
It’s a dance between allowing enough light in to form the trails, but not so much that the entire scene gets blown out. It’s a delicate balance, but one that yields incredibly rewarding results.
Shutter Speed: The Lifeline of Your Light Trails
Your shutter speed is the absolute cornerstone of light trail photography. This setting dictates how long your camera’s sensor is exposed to light, and in our case, how long those moving lights have to “paint” their trails.
Generally, you’ll want to be in the range of 5 to 30 seconds, sometimes even longer using a “bulb” mode, which lets you keep the shutter open for as long as you hold down the remote trigger.
Experimentation is key here! A 10-second exposure might give you nice, defined streaks, while a 25-second exposure could create a more ethereal, interconnected web of light.
Consider the speed of the traffic and how much light you want to capture from their headlights and taillights. Faster traffic will produce longer trails in less time, while slower traffic might need a longer exposure to get the same effect.
Aperture and ISO: The Supporting Cast for Clarity and Depth
While shutter speed dictates the length of your trails, aperture and ISO control the overall brightness and clarity of your image. For light trails, I usually recommend an aperture of f/8 to f/16.
Why? A narrower aperture (higher f-number) gives you a greater depth of field, meaning more of your scene, from the foreground to the background, will be in sharp focus.
This is crucial for keeping those cityscapes crisp. It also helps manage the amount of light entering the lens during those long exposures, preventing overexposure.
As for ISO, *always* aim for the lowest possible setting, typically ISO 100 or 200. Higher ISOs introduce digital noise, which looks like graininess in your photos, especially noticeable in dark areas.
Keeping ISO low ensures a clean, sharp image that you’ll be proud to display. It’s all about finding that sweet spot where everything balances out.
Scouting the Urban Tapestry: Finding Your Perfect Vantage Point
Finding the right spot is like finding a secret treasure chest; it makes all the difference in the world. You can have all the right settings and the best gear, but if your location isn’t compelling, the magic just won’t happen.
I’ve spent countless evenings just wandering around, looking for that perfect intersection, that ideal bridge, or that hidden alleyway that offers a unique perspective.
It’s an adventure in itself, and it often leads to discovering parts of your city you never knew existed. The thrill of finding a new vantage point that promises incredible light trails is truly unmatched.
It’s not just about where the cars are, but how the city lights interact with the architecture and the sky.
Elevated Perspectives: Bridges, Overpasses, and Rooftops
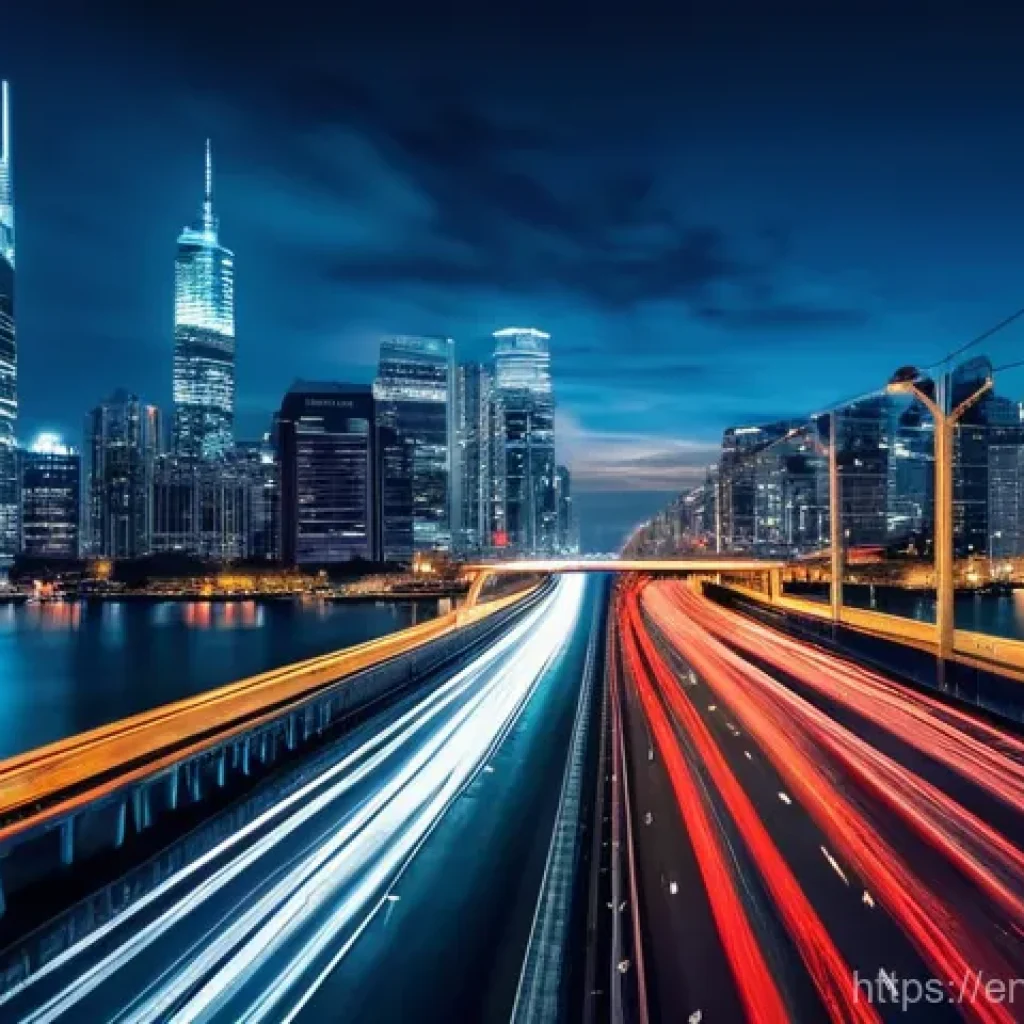
My absolute favorite spots for capturing dramatic light trails are almost always elevated. Bridges, pedestrian overpasses, and even accessible rooftops offer an unparalleled view of the moving traffic below.
From these vantage points, you get a clean line of sight, allowing those light trails to stretch uninterrupted across your frame. It also gives you a fantastic opportunity to include more of the city’s skyline, creating a truly epic sense of scale.
I once found an old parking garage with an open-air top floor, and the view of the downtown intersection from there was absolutely phenomenal. The trails flowed like rivers of light through the concrete canyons.
Always be mindful of safety and legality when scouting for these spots, of course!
The Art of Composition: Framing Your Luminous River
Once you’ve found your spot, it’s time to think about composition. Don’t just point and shoot; think about how you want to frame those beautiful light trails.
The rule of thirds is a classic for a reason – placing points of interest along its lines or intersections can create a more balanced and dynamic image.
Look for leading lines in the roads, sidewalks, or even buildings that can draw the viewer’s eye through the frame and towards the main subject. Including interesting foreground elements like a streetlamp or a part of a building can add depth and context to your urban scene.
It’s about creating a visual journey for anyone looking at your photograph, guiding them through the vibrant energy of the night.
The Clockwork of Creativity: Timing Your Captures
Timing, my friends, is absolutely everything in light trail photography. It’s not just about being there when it’s dark; it’s about being there at the *right* kind of dark, or even during that magical transition from day to night.
I’ve arrived at locations too early, only to find the sky too bright, and too late, when the city’s energy had died down. There’s a sweet spot, a brief window when the world transforms into a photographic wonderland, and hitting that window consistently comes with practice and a keen eye for the evolving light.
It’s a race against the sun, but one that offers incredible rewards if you win.
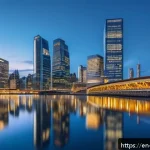
Embracing the Blue Hour: A Photographer’s Golden Opportunity
If you ask any night photographer, many will tell you that “blue hour” is their favorite time to shoot, and I’m definitely one of them! This magical period, typically 20-30 minutes after sunset (or before sunrise), is when the sky takes on a deep, rich blue hue, and the city lights begin to shine brightly, creating a beautiful contrast.
The ambient light from the sky perfectly balances with the artificial light of the urban environment, preventing the scene from being too dark or too harsh.
The colors are incredibly vibrant, and the overall mood is undeniably captivating. It’s a relatively short window, so planning is crucial. Get to your spot early, set up your gear, and be ready to start shooting as soon as that ethereal blue begins to paint the sky.
The Thrill of Midnight: Capturing the City’s Pulse

While blue hour offers stunning atmospheric shots, don’t shy away from shooting later into the night! As the sky darkens to a deep black, the contrast between the light trails and the background becomes even more dramatic.
This is when the light trails really pop, becoming the undisputed stars of your composition. You might find less overall ambient light, which means you might need slightly longer exposures or a bit of careful light painting, but the results can be incredibly moody and impactful.
Think about the intensity of traffic; rush hour will give you denser, more continuous trails, while late-night shooting might offer more sporadic, isolated streaks, which can be equally artistic.
Each time of night offers a different story waiting to be told through light.
The Digital Darkroom: Enhancing Your Luminous Masterpieces
Taking the picture is only half the battle, my friends. The other, equally crucial half, is what you do with it after the shutter clicks. Post-processing isn’t about fixing bad photos; it’s about *enhancing* good ones and bringing out the full potential of your vision.
It’s where you can refine the colors, deepen the contrasts, and truly make those light trails sing. I used to think editing was just for professionals, but once I started diving in, I realized it’s an incredibly creative part of the process, allowing you to infuse your personal style into every image.
It’s where the raw capture truly transforms into art.
Essential Adjustments for Brilliant Light Trails
When I first open a light trail photo in my editing software, I usually start with the basics. Adjusting the exposure, contrast, highlights, and shadows is critical.
Often, you’ll want to slightly boost contrast to make those light trails stand out against the darker background. Be careful with highlights, though; you don’t want to blow out the brightest parts of the trails themselves.
Correcting the white balance is also essential to get the colors right; sometimes the auto white balance can struggle with mixed city lights, so don’t be afraid to nudge it towards cooler or warmer tones to achieve the desired mood.
Finally, a touch of sharpening can really make the details of the city architecture pop, and a subtle application of noise reduction can clean up any graininess from those long exposures.
Adding Your Artistic Signature: Creative Enhancements
This is where you get to play and really make the image your own. Beyond the basic adjustments, I love to experiment with color grading to give my light trail photos a distinct cinematic or moody feel.
Perhaps a subtle split-toning, adding blues to the shadows and oranges to the highlights, can create a stunning effect. You can also use local adjustment brushes to subtly brighten or darken specific areas – perhaps making the light trails glow a little more, or darkening a distracting element in the background.
Don’t be afraid to try different crop ratios, either; sometimes a panoramic crop can really emphasize the flow of the light trails across the cityscape.
The goal here is to infuse your personality into the image, turning a technically good photo into a truly unique piece of art that reflects your vision.
Overcoming Obstacles: From Frustration to Fantastic Photos
Let’s be real: photography has its frustrating moments. There have been countless times I’ve been out in the cold, setting up my gear, only to realize I forgot a crucial piece, or that my settings were completely off for the conditions.
But here’s the secret: every single one of those “failures” was a learning opportunity. It’s through these challenges that you truly grow and develop your expertise.
Instead of getting discouraged, I learned to troubleshoot on the fly, to adapt, and to understand *why* something wasn’t working. It builds resilience, and honestly, the triumph of finally nailing that perfect shot after a series of struggles feels incredibly rewarding.
Battling Blurs and Noise: Keeping Your Images Clean
The two biggest enemies in night photography, especially with long exposures, are blur and noise. We’ve talked about how a tripod combats camera shake, but even a slight bump can ruin a shot.
That’s why I always recommend using a remote shutter release or your camera’s self-timer (2-second delay usually works) to trigger the shutter without physically touching the camera.
This eliminates any tiny vibrations. As for noise, while keeping your ISO low is the primary defense, sometimes you just can’t avoid a little bit. That’s where good post-processing comes in; modern software has excellent noise reduction algorithms that can clean up your images without sacrificing too much detail.
Always shoot in RAW format too, as it gives you much more latitude for correction in post-production.
| Common Light Trail Photography Issues | My Go-To Solutions |
|---|---|
| Trails are too faint or don’t appear | Increase shutter speed (longer exposure time). Ensure traffic is consistent. |
| Image is too bright / trails are blown out | Decrease shutter speed (shorter exposure). Narrow aperture (higher f-number). Lower ISO. Use an ND filter. |
| Overall image is blurry / soft | Check tripod stability. Use a remote shutter release. Ensure focus is set to infinity or a distant point. Check lens is clean. |
| Too much digital noise (graininess) | Lower ISO. Expose correctly to avoid brightening dark areas too much in post. Use noise reduction in editing software. |
| Colors look unnatural or off | Adjust white balance in camera or during post-processing. Shoot in RAW for maximum flexibility. |
From Trial and Error to True Masterpiece: The Journey of Learning
Photography, like any creative endeavor, is a journey of continuous learning. I’ve made every mistake in the book when it comes to light trail photography, from forgetting my tripod plate to accidentally shooting at ISO 6400 for a 30-second exposure (yes, the noise was epic!).
But each of those moments taught me something invaluable. The beauty of it is that every time you go out and try, you learn a little more about your camera, about light, and about your own creative vision.
Don’t be afraid to experiment, to try unconventional angles, or to push your settings to their limits. The “rules” are often just guidelines, and sometimes breaking them in interesting ways leads to your most unique and powerful images.
The real magic happens when you embrace the process, learn from every shot, and keep chasing that perfect urban glow.
Wrapping Things Up
And there you have it, my friends! We’ve journeyed through the ins and outs of capturing those mesmerizing car light trails, from the essential gear you’ll need to the subtle art of timing and post-processing. It’s truly been a blast sharing my own experiences and lessons learned along the way. Photography, especially at night, is a magical endeavor that constantly pushes you to see the world in new and exciting ways. I genuinely hope this guide inspires you to grab your camera, embrace the night, and start painting your own urban masterpieces with light. The city is waiting for your unique vision!
Handy Tips You’ll Love
To help you on your luminous photographic journey, here are a few extra nuggets of wisdom I’ve picked up over the years:
1. Always Scout Your Locations During Daylight: Trust me on this one. What looks like a promising spot at night can be full of hidden dangers or obstructions. A quick daytime visit saves you headaches and ensures safety when the sun goes down.
2. Pack an Extra Battery (or Two!) and a Power Bank: Long exposures drain batteries faster than you think, especially in cold weather. There’s nothing worse than finding the perfect shot and running out of juice. I’ve been there, and it’s a bummer!
3. Use a Remote Shutter Release or Your Camera’s Self-Timer: Even with a sturdy tripod, pressing the shutter button can introduce tiny vibrations that cause blur. A remote or a 2-second self-timer delay eliminates this entirely, giving you tack-sharp static elements.
4. Experiment with Different Exposure Times: Don’t be afraid to play around! A 5-second exposure creates thinner, more defined trails, while a 30-second exposure can weave a dense, abstract tapestry of light. Each scene, and your creative vision, will dictate the best duration.
5. Don’t Overlook Post-Processing: Your camera captures the data, but you get to shape the art. Learning basic editing techniques for contrast, color, and sharpness can dramatically elevate your light trail photos, making them truly pop off the screen.
Key Takeaways
Mastering car light trails is a thrilling aspect of night photography that combines technical skill with artistic vision. It all begins with a solid foundation: a sturdy tripod is absolutely non-negotiable for achieving sharp images during long exposures, and a camera with manual controls paired with a versatile wide-angle lens gives you the creative freedom you need. The real magic unfolds when you grasp the interplay of your camera settings, primarily an extended shutter speed (5-30 seconds), a narrower aperture (f/8-f/16) for depth of field, and the lowest possible ISO (100-200) to minimize noise. Don’t underestimate the power of location and timing; elevated vantage points during the “blue hour” can transform your photos, but deep night also offers dramatic contrasts. Finally, remember that post-processing is where you refine your vision, enhancing colors and details to bring your luminous masterpieces to life. Embrace experimentation and learn from every shot, because the journey itself is as rewarding as the incredible images you’ll create.
Frequently Asked Questions (FAQ) 📖
Q: I’m just starting out with night photography and car light trails look amazing! What’s the absolute minimum gear I need to even attempt this, without breaking the bank?
A: Oh, I totally get that feeling! When I first started, I thought I needed an arsenal of expensive equipment, but honestly, you’d be surprised how little you actually need to capture stunning light trails.
The absolute non-negotiable, can’t-live-without item is a sturdy tripod. Seriously, this isn’t optional – it’s the anchor for those long exposures. Without it, everything will be a blurry mess, and trust me, I learned that the hard way trying to brace my camera on railings!
Next up, you need a camera that allows for manual settings, especially shutter speed. Most interchangeable lens cameras (DSLRs or mirrorless) will do the trick, even older models.
You don’t need the latest, fanciest full-frame beast. I’ve seen incredible results from entry-level cameras. Beyond that, a basic kit lens is perfectly fine to start.
As you get more into it, you might consider a wider lens, but for your first few attempts, work with what you have. A remote shutter release is a fantastic addition, preventing any camera shake when you press the shutter button, but if you don’t have one, just use your camera’s 2-second timer.
That’s it! Tripod, manual-capable camera, and a lens. Go out and experiment; the magic often happens with simple tools and a lot of passion!
Q: I’ve tried long exposures, but sometimes my light trails look thin and weak, or the whole scene just looks overexposed. How do I find that sweet spot for truly vibrant, smooth light trails?
A: That’s a classic hurdle, and one I wrestled with for ages! It’s all about a delicate dance between your camera settings, and once you get the feel for it, it becomes second nature.
Think of it like this: your shutter speed controls how long the light paints. For dramatic trails, you’ll want a longer shutter speed – I often start around 10-20 seconds.
This allows enough time for the cars to move through the frame and create those beautiful streaks. Now, if everything else is overexposed, that’s where your aperture and ISO come in.
Your aperture (the f-number) controls how much light hits the sensor. A higher f-number (like f/11 or f/16) means a smaller opening, letting in less light, which helps keep the background and ambient streetlights from blowing out.
It also gives you more depth of field, keeping more of the scene sharp. Finally, ISO is your camera’s sensitivity to light. For night shots and light trails, you want your ISO as low as possible – think ISO 100 or 200.
This dramatically reduces noise and keeps your images clean. So, a good starting point is a low ISO (100-200), a relatively closed aperture (f/8 to f/16), and then adjust your shutter speed until you get those perfect, bright trails without overexposing the rest of your shot.
Don’t be afraid to take a few test shots and adjust; that’s how you really learn what works for your specific scene!
Q: I can capture basic light trails, but I want my photos to really stand out and have that “wow” factor. What are some pro tips for composition and unique perspectives to make my light trail shots more artistic and engaging?
A: I love that you’re pushing past the basics! That’s where the real fun begins and where you start developing your unique style. Beyond just capturing the trails, composition is key to making your photos truly memorable.
First, think about your vantage point. Don’t just shoot from eye-level on the sidewalk. Can you get up high on a bridge or a parking garage to look down on the traffic?
Or maybe get really low to emphasize the speed and movement? I’ve found some of my most captivating shots from unexpected angles. Second, look for leading lines.
The light trails themselves are powerful leading lines, so use them to draw the viewer’s eye through the frame, perhaps towards a landmark or a vibrant building in the distance.
Reflections are another absolute game-changer! After a rain shower, puddles and wet streets can create incredible mirrored light trails, doubling the visual impact.
I’ve spent entire evenings just scouting for reflections, and believe me, it’s worth it. Finally, don’t be afraid to incorporate other elements into your frame that tell a story – a lone pedestrian, an interesting architectural detail, or even just the hazy glow of streetlights in the background.
It’s about blending the dynamic movement of the light trails with the static beauty of the urban environment. Experiment, explore, and let your creativity lead the way – that’s how you move from good to absolutely breathtaking!